How to Publish a Squarespace Website in 2025 (3 Easy Steps)
The brilliant thing about Squarespace is that it’s so easy to get started.
You don’t have to worry about finding a hosting provider or learning how to code. You can dive right in and have a fantastic-looking website in just ten minutes!
Here’s how to launch and publish your very own Squarespace website.
Step 1: Sign up for Squarespace
If you haven’t already, the first step is to set up your Squarespace account. Go to www.squarespace.com and click Get Started.
Tell Squarespace what type of site you’re creating, and it will suggest some templates for you to use. Alternatively, you can build your own using Squarespace Blueprint.
Create your account, and Squarespace will automatically put you on a free 14-day trial. You can build your site during this time, but you won’t be able to make it live. You can add a password though, and let selected people view your site.
Need hints and tips for designing and building your Squarespace website? Check out the Spark Plugin blog!
Step 2: Upgrade to paid service
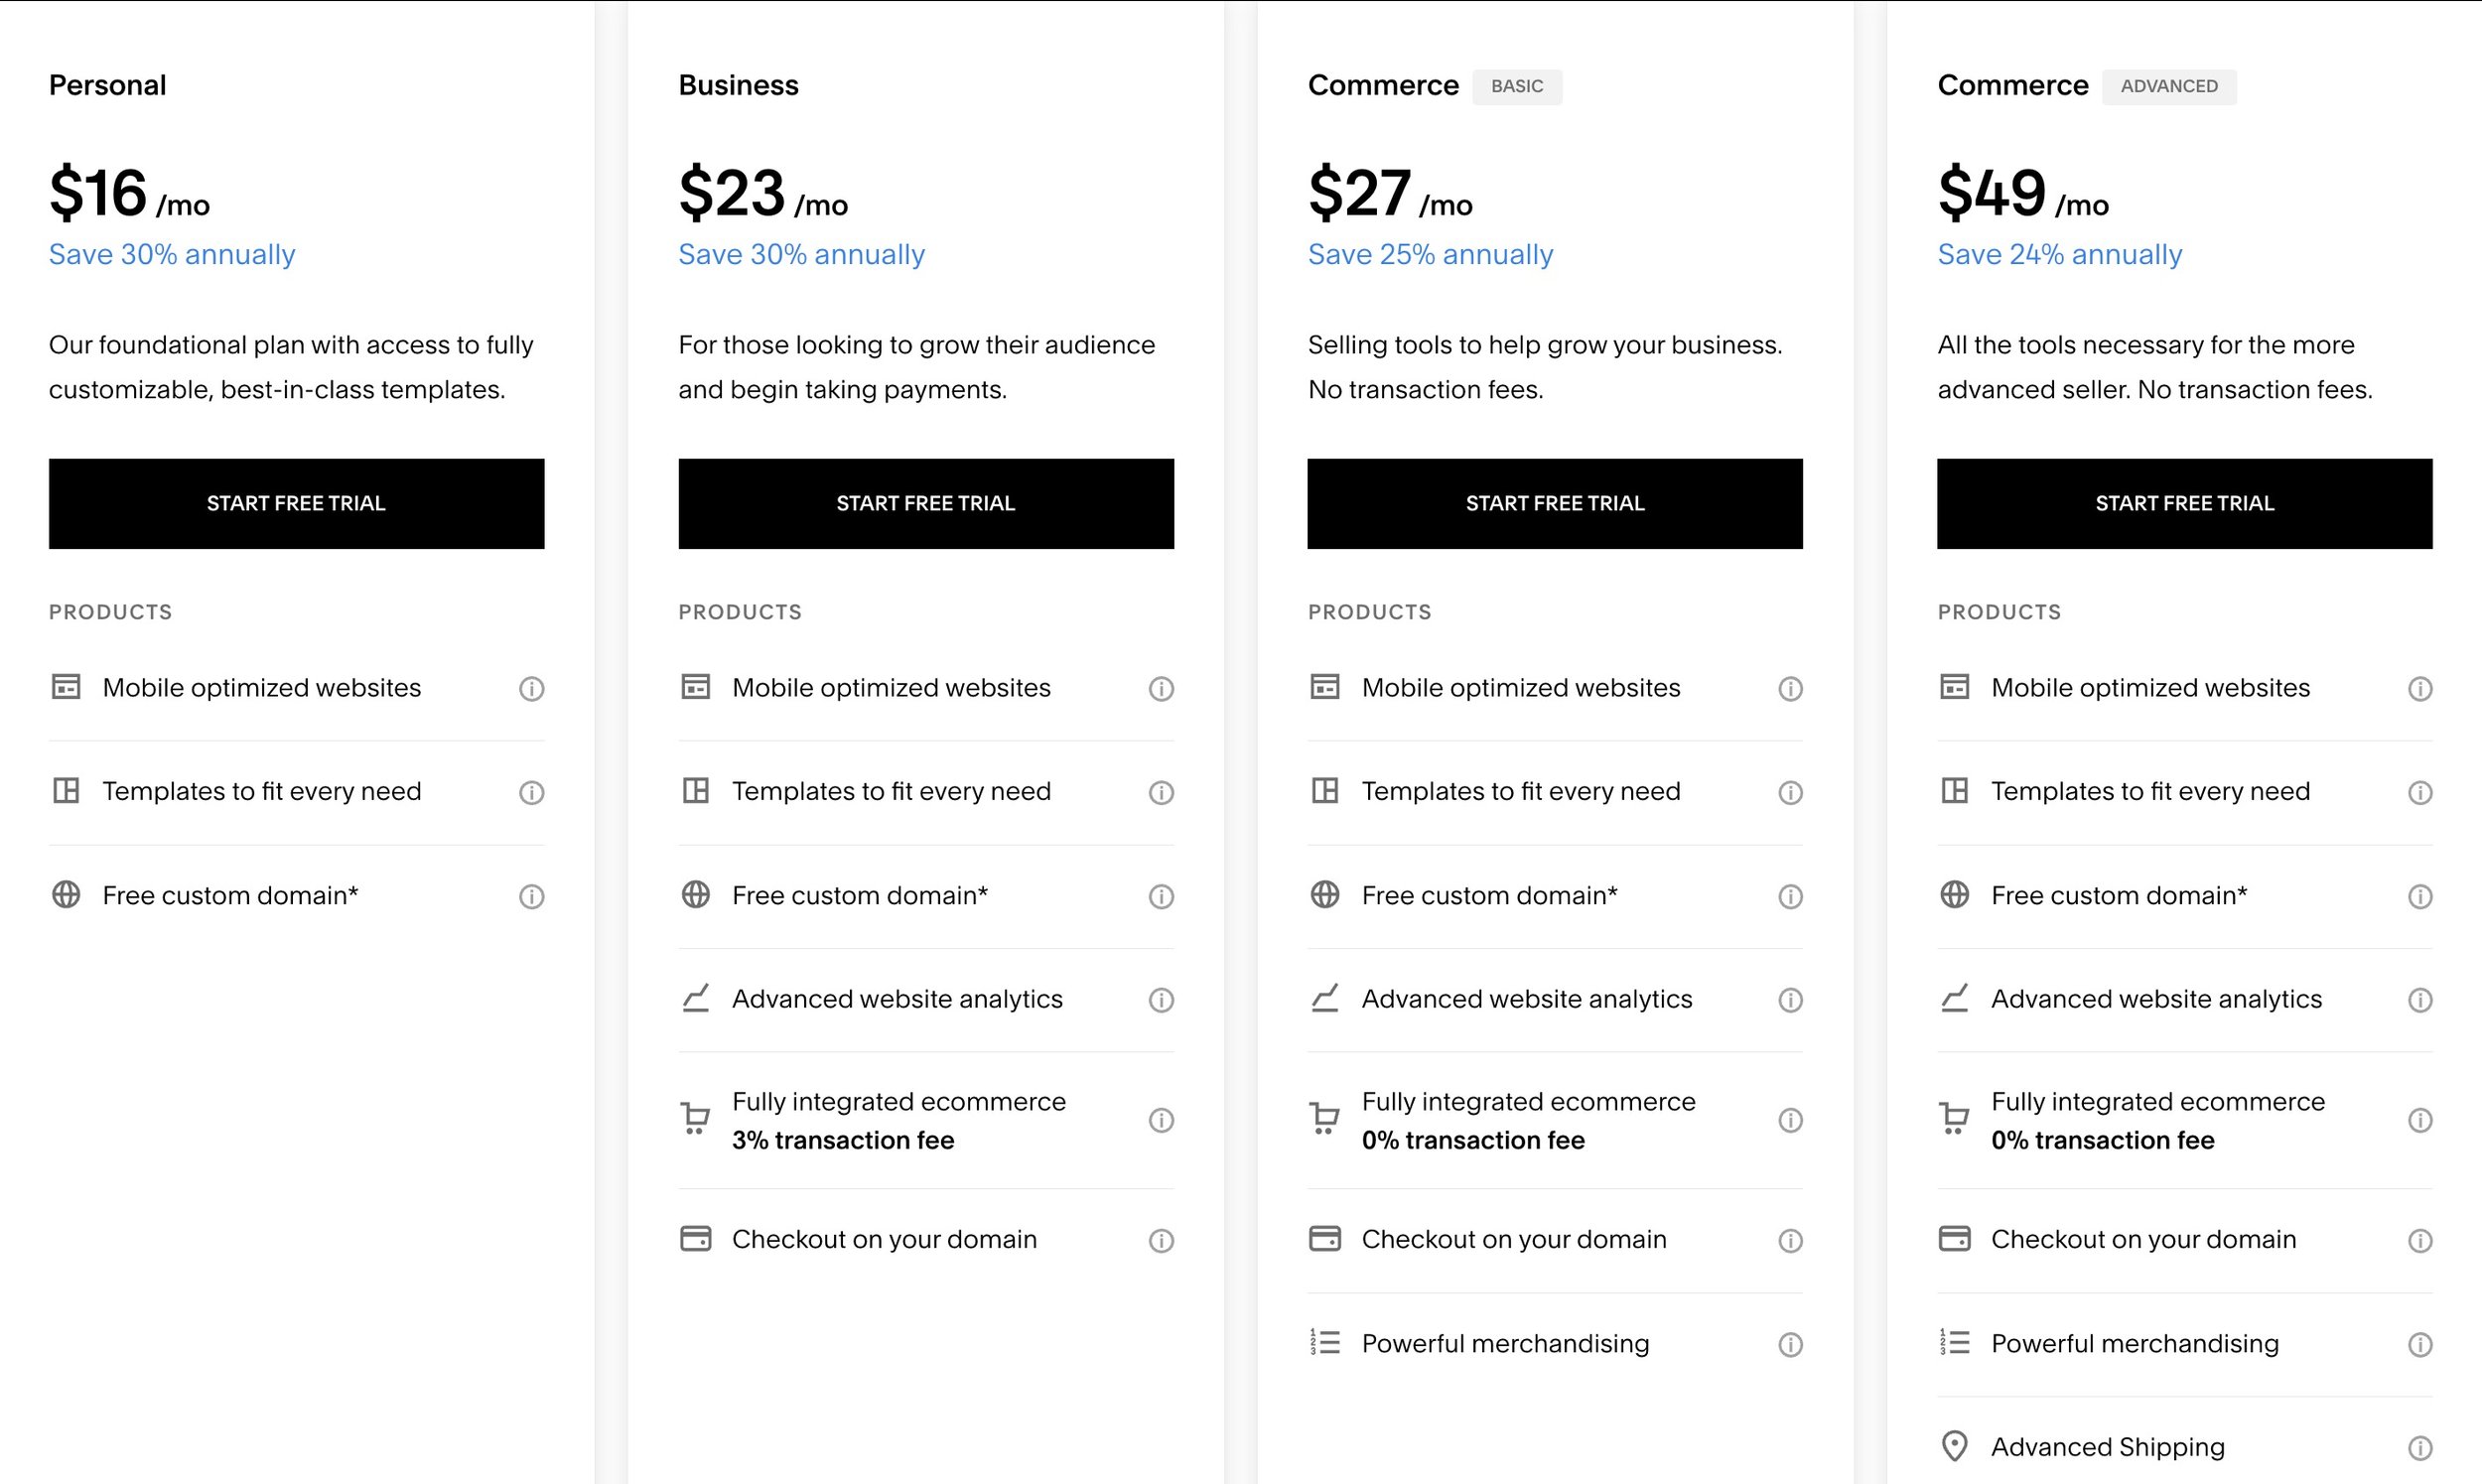
When you’re ready to publish your Squarespace website, you’ll need to upgrade to a paid service. Squarespace has four different pricing plans: Personal, Business, Basic Commerce, and Advanced Commerce.
To do this, click the Upgrade button, which will be visible in edit mode, or go to Settings, Billing, and Subscriptions. Choose the plan you want to sign up for and whether you want to pay monthly or annually.
Next, enter your payment information. Review your details, and add your promo code if you have one. Click Confirm and purchase, and you’re ready to go live!
Step 3: Make your website live
Now it’s time to publish your Squarespace website. This means everyone who has the URL will be able to view your site, and it will be indexable in the search engines.
Before you begin, do a quick check of your site to make sure it’s looking good and working as it should:
Look at your website on a mobile phone to ensure it’s mobile-responsive
Check your internal and external links to make sure they go to the right place
Read your page copy to ensure it’s easy to understand and doesn’t contain spelling mistakes
Review the page navigation to ensure it flows well and all pages are easy to access
Make sure you’ve replaced the default favicon with your own
When you’re ready, go to Settings, Site Availability, and toggle the radio button from Private to Public. If you haven’t already upgraded to paid service, Squarespace will prompt you to do so before you change your settings.
Click Save, and congratulations! Your Squarespace site is now published!
Now that you know how to publish a Squarespace website, the sky’s the limit. You can create a blog, set up eCommerce functionality, build image galleries…. The possibilities are endless!
What will you do with your awesome new Squarespace site?


