How to Set Up Donations on Squarespace (2025 Guide)
Do you run a charity, or would you like people who read your blog to buy you a coffee to say thanks?
Offering donations functionality on your website is a brilliant way to encourage visitors to give. Visitors can send a one-off donation or set up regular donations.
Plus, you can customize your Squarespace donations form to get exactly the look and feel you want for your website.
Here’s how to accept donations on Squarespace
Step 1: Access the donations menu
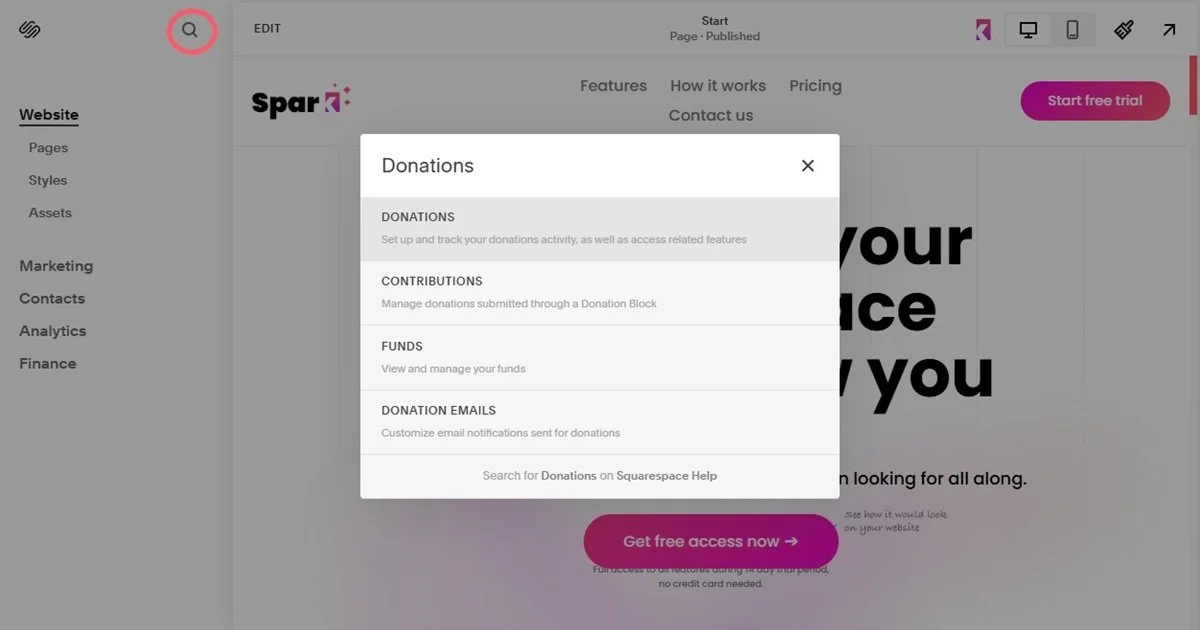
If Donations isn’t in your sidebar menu, click the Search icon in your Squarespace menu and type Donations to bring up the Donations menu.
(If you want to add Donations to your sidebar, you can do this by clicking the Customize Sidebar button at the bottom of your menu and turning Donations on.
Step 3: Add your donation block
Go to the page you want to add a donation block to.
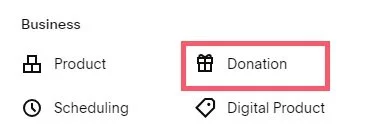
Go to the part of the page you want to add a donation block to and click the blue plus (+) button. Choose Donation in the menu.
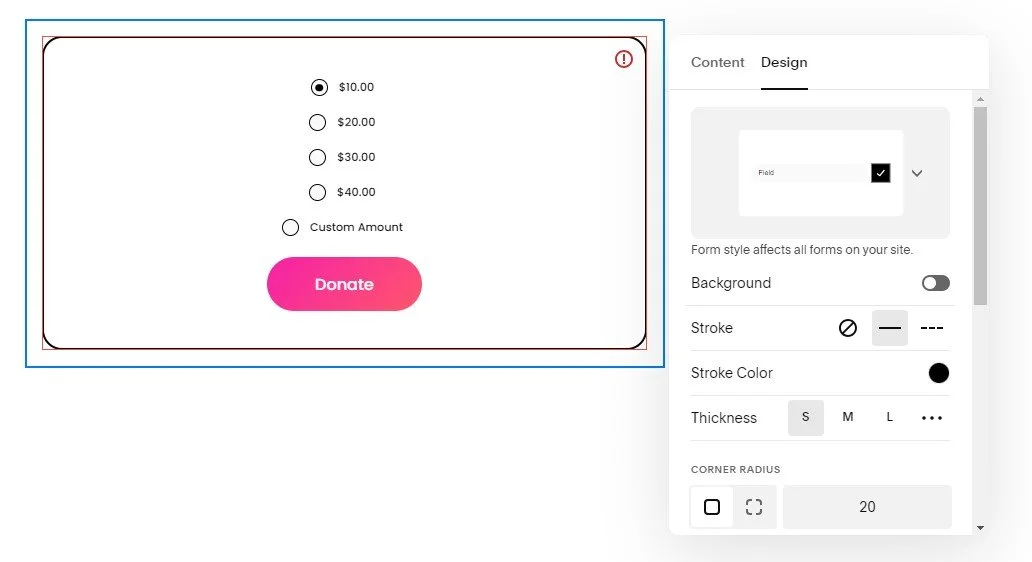
Your donation block will appear.
Click on the pencil icon to edit the settings. From here you can:
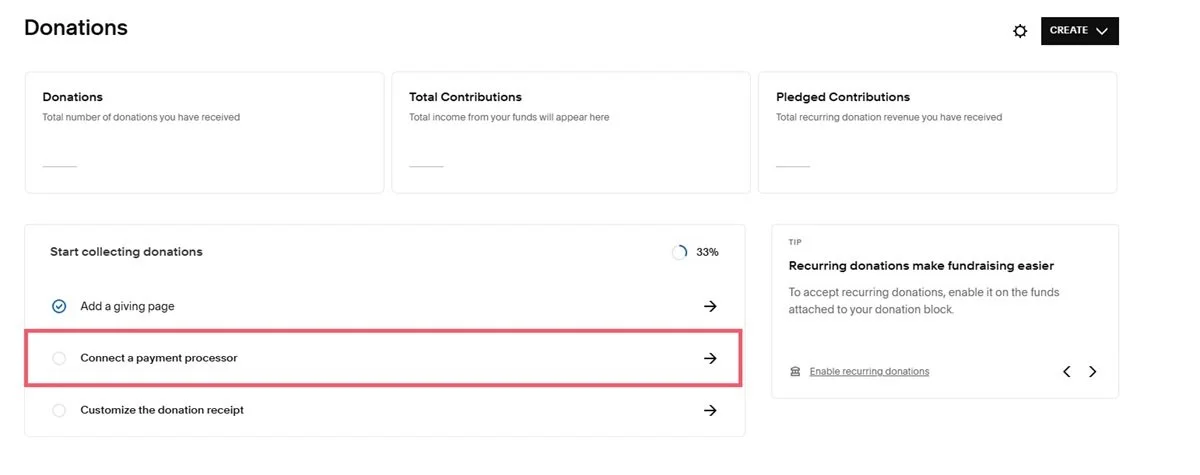
Set up your payment processor if you haven’t already
Turn on customer accounts if you want to accept weekly or monthly recurring payments (Even if you only want to offer one-off donations, customer accounts make it easier for web visitors to save their details)
Change the donation fund (this lets you attribute contributions to different causes)
Change the button text
Amend the design of the donation box. For example, you can add a background, change the padding and alignment, and change the button color and style
(Don’t forget that you can alter the design of your donation box even more with Spark Plugin’s range of customizations!)
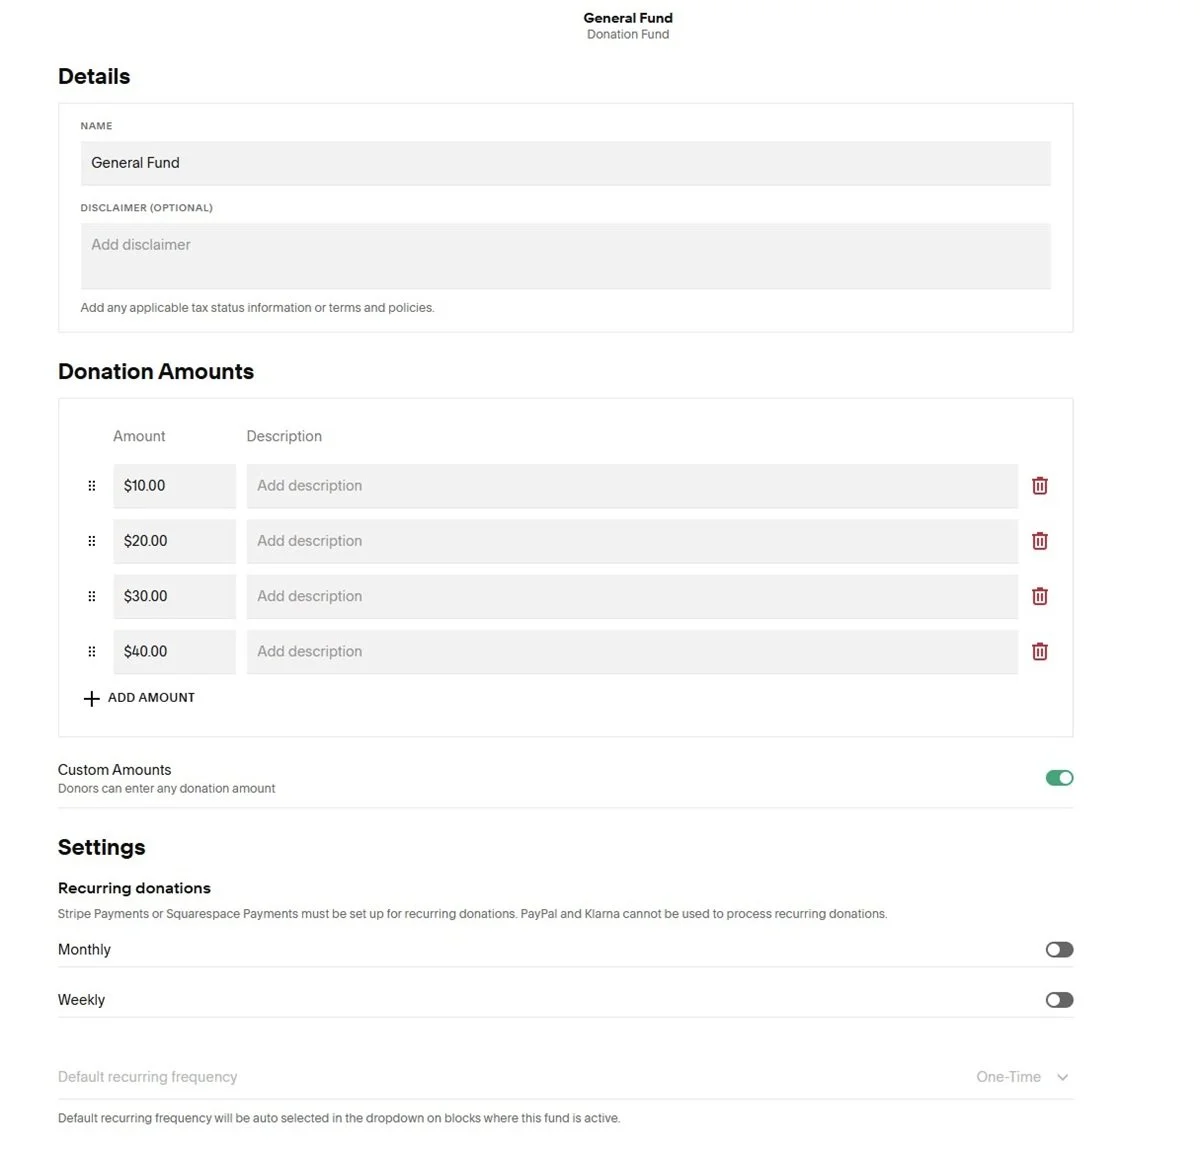
To change the donation amounts, click on Funds and click the pencil icon next to the fund you want to edit.
When you’re done, Publish your page and your Squarespace donation box will go live.
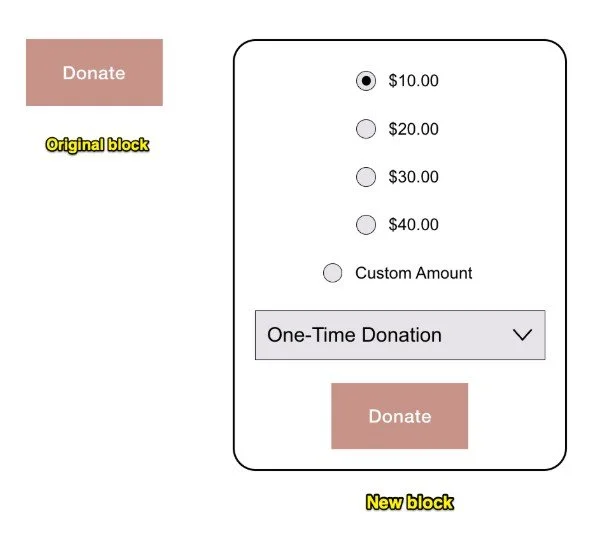
I have an old donations block on my site but it doesn’t have all these features…
Squarespace updated the donation block in July 2024 with more functionality.
If you have an old donation block added before this time, you won’t be able to access this additional functionality. Donations through the old blocks will also not be counted through the donations menu.
To get the new functionality, you will need to delete the old block and replace it with a new one.
Step 4: Customize your donation settings
Squarespace makes it easy to monitor and manage your donations. You can do the following through the Donations panel:
See how many people have donated and how much money you’ve made
See money donated by fund
See a list of donors. You can segment this information by first-time customers and people who make regular donations. You can also create your own segments
Customize customer notifications, for example, if a customer sets up a donation or a payment is declined
Export a list of donations in CSV format
Customize the checkout process that people see when they make a donation
Refund a donation – the process to do this will depend on the payment processor you use. You can also cancel a recurring donation
Is Squarespace donations free?
It’s free in that you don’t have to pay to set up donation blocks on your website.
However, you’ll have to pay transaction and processing fees on any donations you receive. These fees vary depending on the payment processor you use and the amount of money that’s donated.
This means that you won’t see the full amount that people donate.
Do I have to use the Squarespace donation block?
No. You can set up a donation button in PayPal or use Payment Links in Stripe if you prefer.
However, the beauty of Squarespace donations is that you can customize the box to match your website’s branding and manage donors directly on your website.
This is great if you want to market to them, for example, through an email newsletter.
And there you have it, how to set up donations on Squarespace .
If you want extra revenue for your not-for-profit organization, Squarespace donations is an easy way to encourage people to donate.
Looking for more ways to cut costs if you run a non-profit? Here are four secrets for saving money on your Squarespace site!


